Configure Cisco Firepower and Cisco ISE for AnyConnect VPN Authentication and Dynamic Group Policy Mapping
Device Versions in this document:
- Cisco ISE – Version 2.4 Patch 11
- Cisco FMC – Version 6.5.0.4
- Cisco FTD – Version 6.5.0.4
In this article we will see how to configure Cisco Firepower using Firepower Management Centre (FMC) and Cisco ISE for AnyConnect VPN authentication and authorisation using dynamic Group Policy mapping from ISE. For example, you have different rules and ACL for Employees, Vendors, etc, you can create different Group Policy with all these rules and based on used connecting via AnyConnect, you can dynamically assign Group Policy from ISE. If vendor user connects, he will be allocated Vendor VPN Group Policy, hence restricting with Vendor ACL and other rules.
Cisco ISE is an AAA server supporting RADIUS (as default) and TACACS+ protocol for Authentication Authorisation and Accounting. We can use ISE with Firepower to authenticate VPN clients and apply specific VPN group policy based on centralised directory like MS Active Directory (AD).
Steps Overview:
- Connect Cisco ISE with Cisco FTD and FMC and configure Cisco FTD VPN Policy via FMC to authenticate and authorise thru Cisco ISE
- Configure Cisco ISE parameters for VPN Authentication
- Configure Cisco ISE parameters for Dynamic Authorisation – Authorisation Policy
- Configure different Cisco ISE policy for each VPN user category (e.g. Vendor, Employee, etc)
- Testing and verification of the policy
Step 1 – Connect Cisco ISE with Cisco FTD and FMC and configure Cisco FTD VPN Policy via FMC to authenticate and authorise thru Cisco ISE
In this phase, we will configure Cisco ISE to allow AAA requests from Cisco FTD and FMC. When a VPN user connects, FTD will be sending request to ISE. Adding FMC is optional, but can be used for FMC GUI/CLI login authentication via ISE using centralised directory. You can skip this step, if FTD and FMC is already added to ISE. Also, we will configure VPN Policy to user ISE for Authentication, Authorisation and Accounting via FMC.
- Login to Cisco ISE
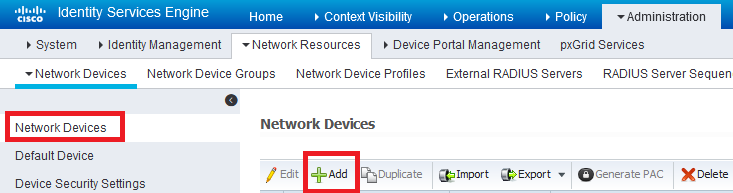
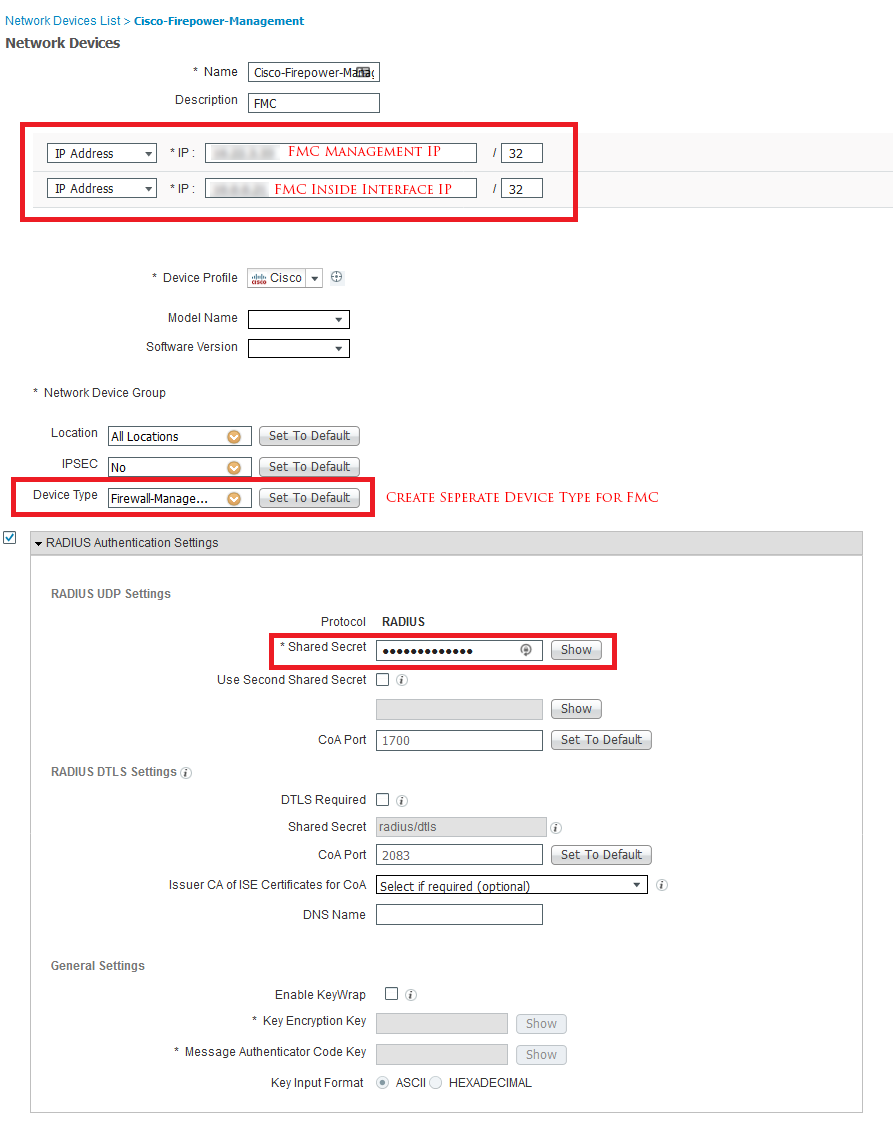
- Navigate to Administration ⇾ Network Resources → Network Devices
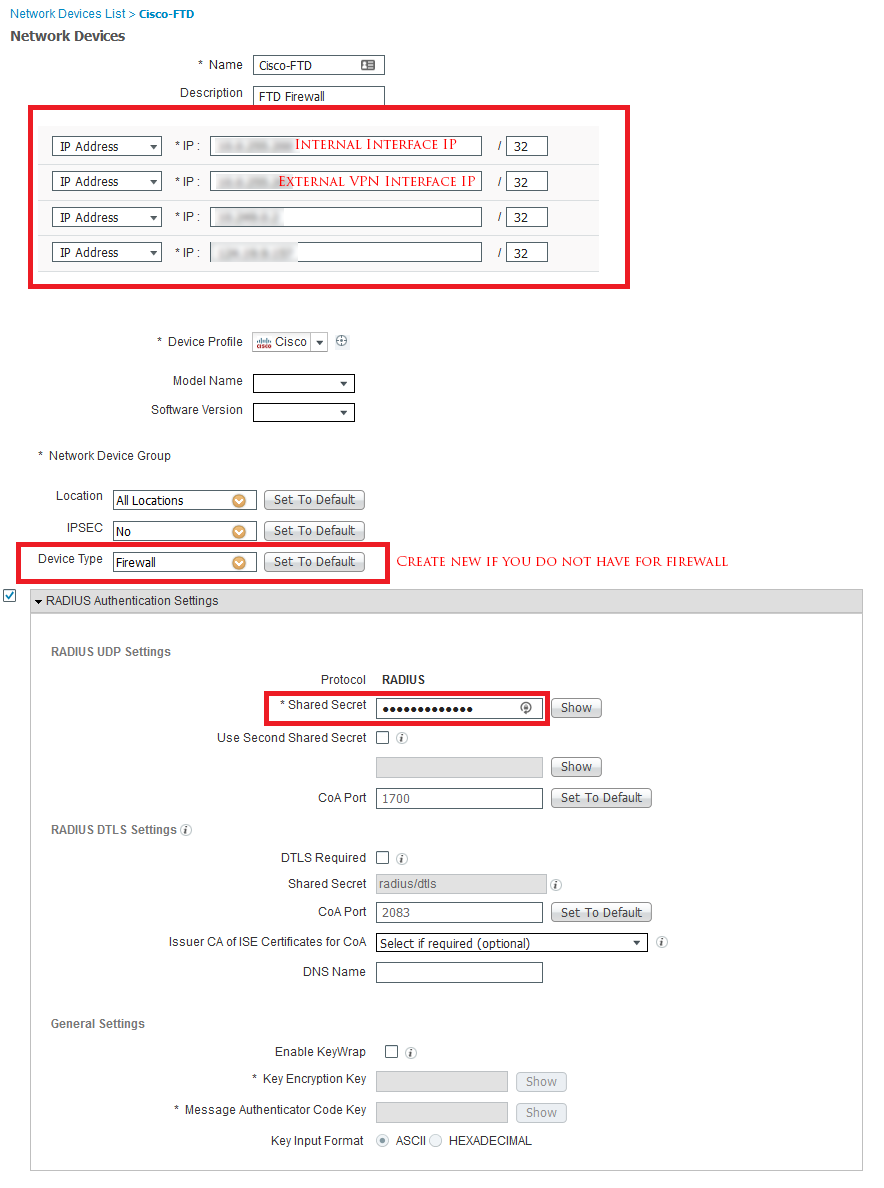
- Click Add, and configure the below parameters:
- Name and Description – As you like
- IP address – Configure FTD inside, and outside interface (VPN Interface) IPs. If VPN connects to a different interface, please include that interface IP as well. Because FTD will send request to ISE from interface where VPN is connected.
- Configure Device type, recommended adding new, so that it doesn’t disturb any of your existing settings.
- Configure Shared Key, this key will be later used with FTD/FMC configuration of Cisco ISE in FMC
- Follow the same above steps to add FMC.
- Login to Cisco Firepower Management Centre (FMC)
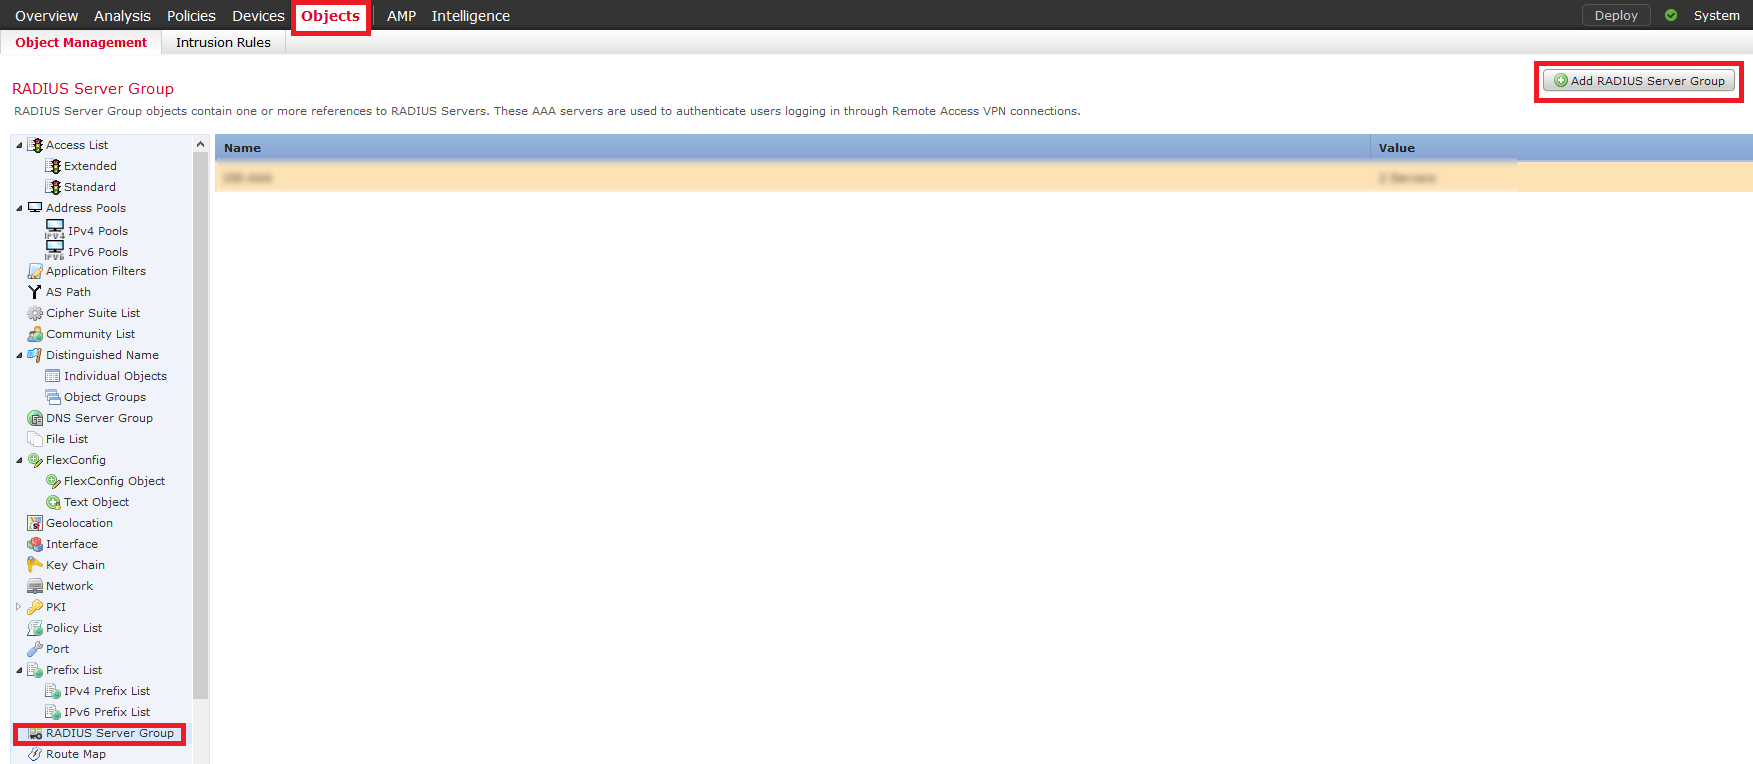
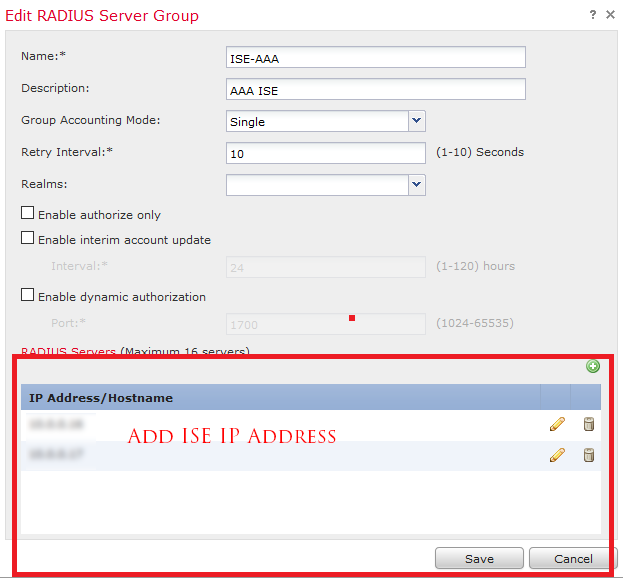
- Navigate to Objects → RADIUS Server Group → Add New
- Configure the name, description and add all you PSN ISE IP addresses
- Save the configuration
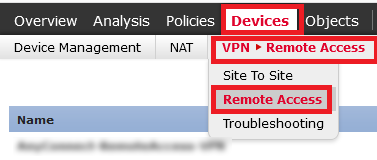
- Navigate to Device ⇾ VPN ⇾ Remote Access
- Open your remote access policy
- Edit your VPN policy
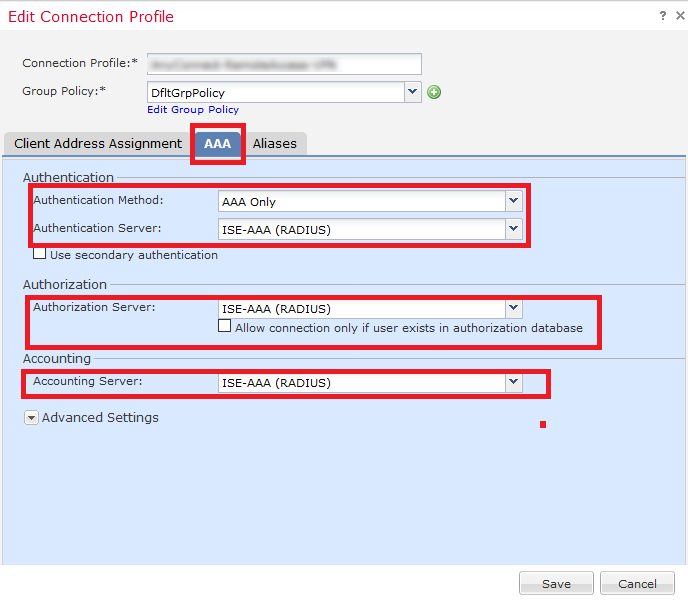
- Navigate to AAA tab
- Select ISE-AAA (RADIUS) under your Authentication, Authorisation and Accounting Server
- Save the setting and Deploy the Change


Step 2 – Configure Cisco ISE parameters for VPN Authentication
In this phase we will configure parameters used for VPN authentication in Cisco ISE policy, like AD group membership, etc. In my configuration I will use three AD Groups for Employee, Vendor and ITSupport.
- Login to Cisco ISE
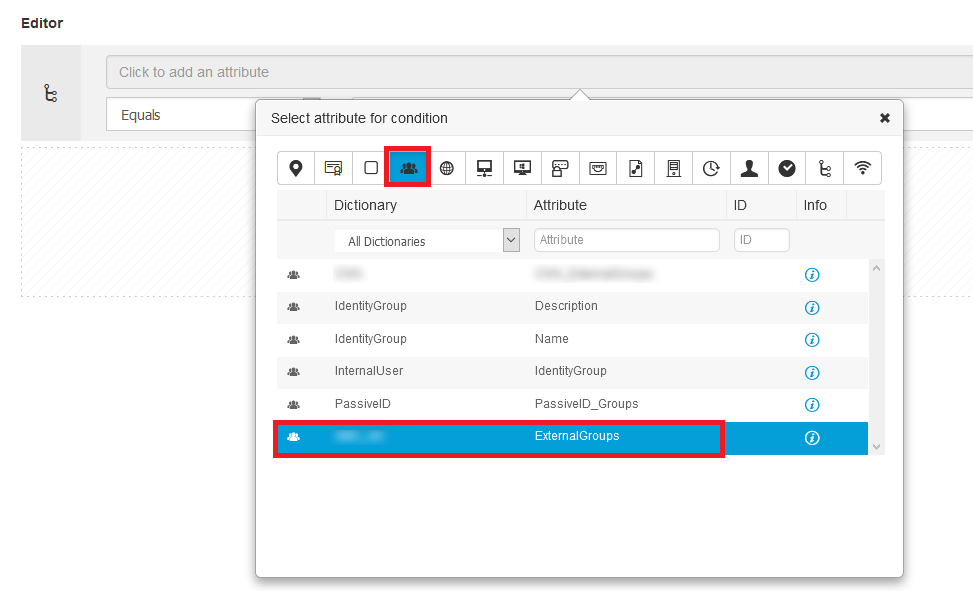
- Navigate to Policy ⇾ Policy Elements ⇾ Conditions
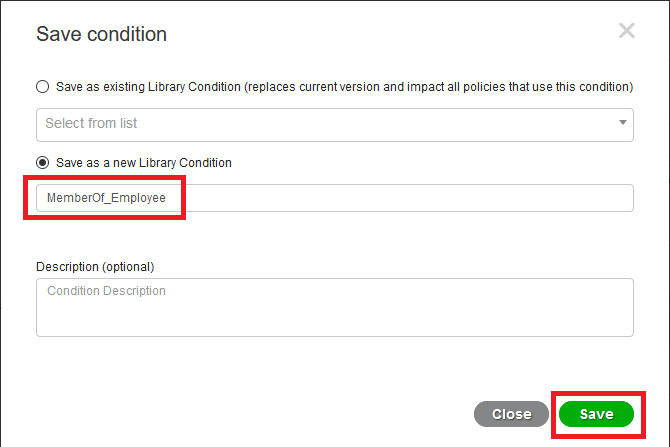
- We will create Condition Element for those three AD groups by selecting below:
- In Attribute, select Identity ⇾ Your AD Group ⇾ Equals ⇾ <Select your AD Group>
Note – If you do not see AD group, you first have to add that AD group to ISE from Administration ⇾ External Identity Source →Active Directory → <Your Directory> → Groups → Add
Similarly create Condition Element for other two Groups – Vendor and ITSupport

Step 3 – Configure Cisco ISE parameters for Dynamic Authorisation – Authorisation Policy
In this phase, we will create resultant authorisation policy/profile when authentication and authorisation is successful. In this phase we will mention the Group Policy Name to be applied to the user.
- Login to Cisco ISE
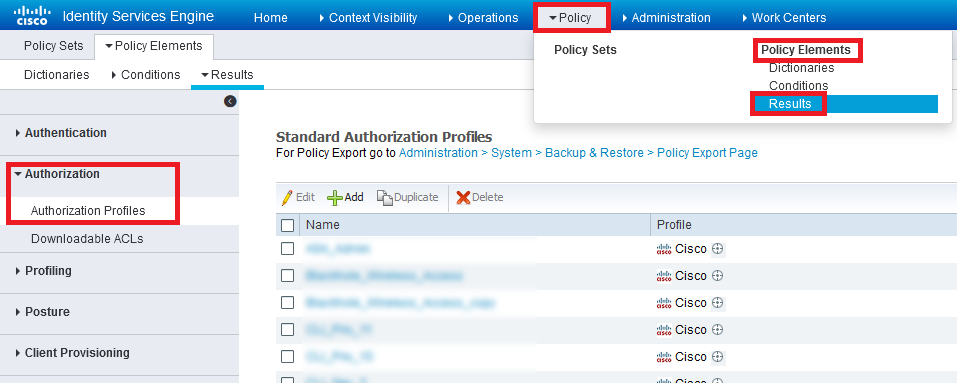
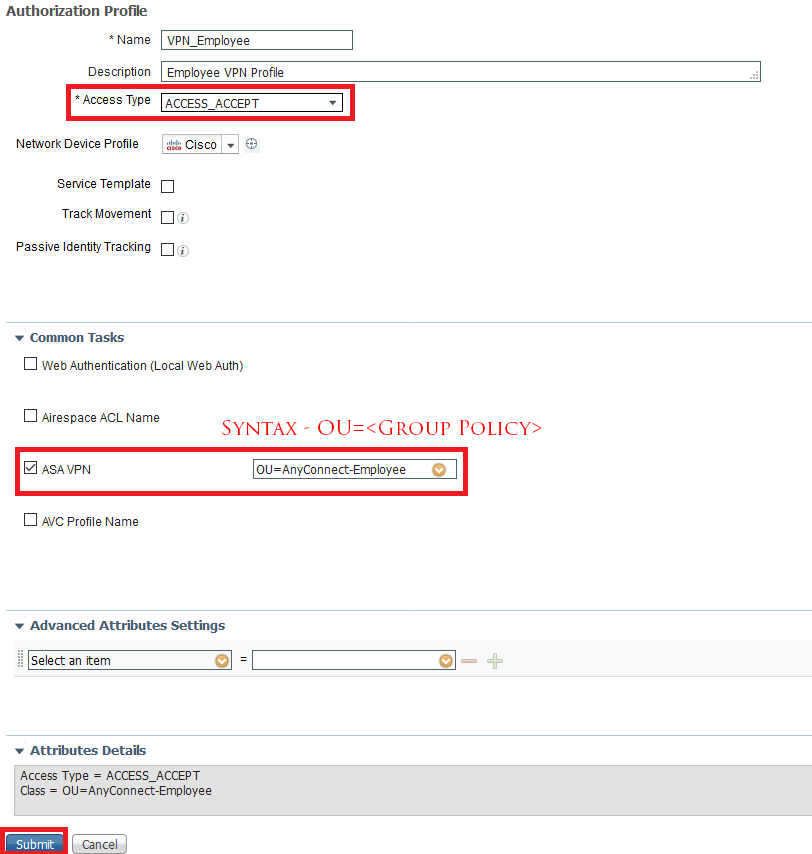
- Navigate to Policy ⇾ Policy Element ⇾ Results ⇾ Authorisation ⇾ Authorisation Profiles ⇾ Add
- Configure as below:
- Name and Description – As per your choice or naming convention
- Access Type – ACCESS_ACCEPT
- Common Tasks ⇾ ASA VPN ⇾ OU=<Group Policy Name>
- Submit
- Create for Employee, Vendor and ITSupport as per Step 3.
Step 4 – Configure different Cisco ISE policy for each VPN user category (e.g. Vendor, Employee, etc)
In this phase, we will create ISE policy for each VPN user.
- Login to Cisco ISE
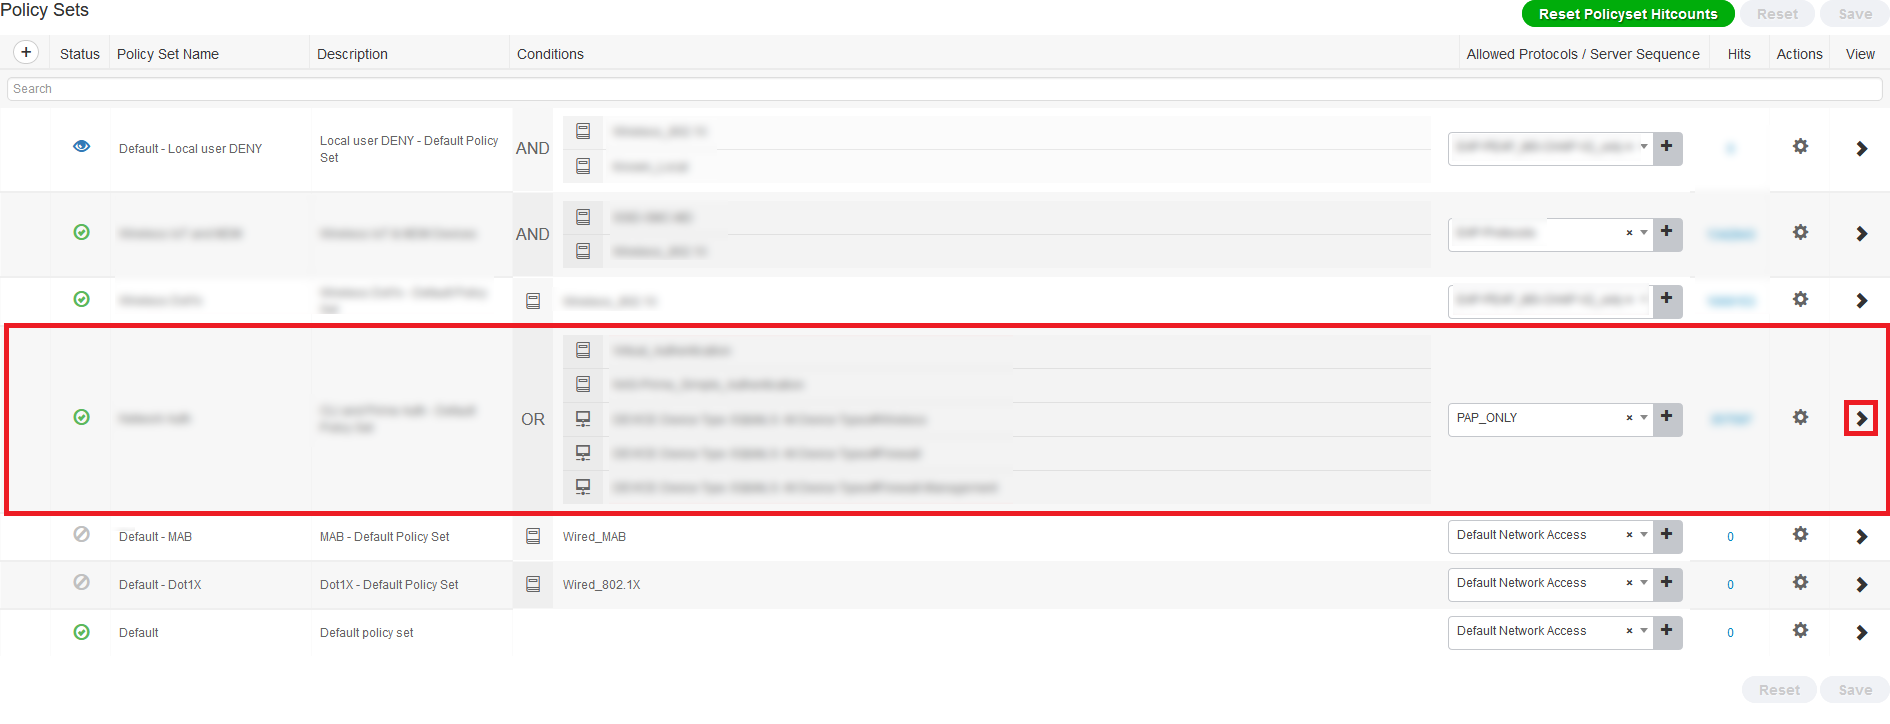
- Navigate to Policy ⇾ Policy Set ⇾ Select your main policy
- Add new authorisation policy at top as below:
- Name – VPN-Employee
- Conditions:
- DEVICE – Device Type à Equals à Firewall
- Cisco-VPN3000·CVPN3000/ASA/PIX7x-Tunnel-Group-Name ⇾ Equals ⇾ <AnyConnect Remote Access Connection Profile Name>
- MemberOf-Employee
- Result à VPN-Employee
- Similarly, create authorisation rules for Vendor and ITSupport, just change the MemberOf and Resultant Policy.


Step 5 – Testing and Verification of the policy
In this phase, we will connect via VPN and test if we getting the right policy, ACL and IP address.
- Connect using Employee username/password group via AnyConnect
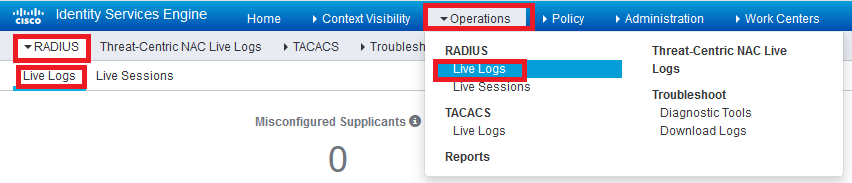
- Login to Cisco ISE
- Navigate to Operations ⇾ Live Log
- Search based on the username to see the log
- Find the VPN policy log and click the Details’ column Magnifying Glass to view details
- In details section you can see, resultant policy, which rule it is hitting, AD group and all other details.
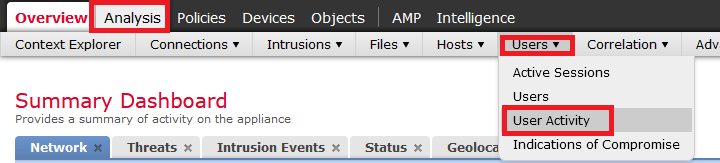
- Login to Cisco FMC to verify under FMC
- Navigate to Analysis ⇾ Users ⇾ User Activity
- Search based on username
- You will see a record of your user with Group Policy details.